Showing posts with label Linux. Show all posts

Tuesday, February 4, 2025

Linux 101: Final Part - Advanced Linux Topics and Future Learning


This final part of our Linux 101 series explores advanced Linux topics for those who want to take their skills to the next level. We will cover kernel tuning, security hardening, containerization, DevOps tools, automation, and Linux in cloud environments.

1. Linux Kernel Tuning and Optimization

The Linux Kernel is the core of the operating system. Advanced users can customize and optimize it for better performance.

1.1 Checking and Modifying Kernel Parameters

  • View system parameters:
    sysctl -a
    
  • Modify a kernel parameter (e.g., increase max open files):
    sudo sysctl -w fs.file-max=2097152
    
  • Make changes permanent:
    echo "fs.file-max=2097152" | sudo tee -a /etc/sysctl.conf
    sudo sysctl -p
    

1.2 Compiling a Custom Kernel

  • Download the latest kernel source:
    wget https://cdn.kernel.org/pub/linux/kernel/v6.x/linux-6.1.tar.xz
    
  • Extract and configure:
    tar -xvf linux-6.1.tar.xz && cd linux-6.1
    make menuconfig
    
  • Compile and install:
    make -j$(nproc)
    sudo make modules_install
    sudo make install
    

2. Linux Security Hardening

Security hardening involves strengthening the system to reduce vulnerabilities.

2.1 Secure SSH Configuration

  • Disable root login:

    sudo nano /etc/ssh/sshd_config
    

    Set:

    PermitRootLogin no
    

    Restart SSH:

    sudo systemctl restart sshd
    
  • Use SSH keys instead of passwords:

    ssh-keygen -t rsa -b 4096
    ssh-copy-id user@server
    

2.2 Enable Mandatory Access Controls

  • SELinux (RedHat/Fedora-based systems):
    sudo setenforce 1
    
  • AppArmor (Ubuntu-based systems):
    sudo aa-status
    

2.3 Implement File Integrity Monitoring

  • Install AIDE (Advanced Intrusion Detection Environment):
    sudo apt install aide -y
    sudo aideinit
    sudo mv /var/lib/aide/aide.db.new /var/lib/aide/aide.db
    sudo aide --check
    

3. Linux Containers and Virtualization

3.1 Docker for Containerization

Docker helps run applications in isolated containers.

  • Install Docker:
    sudo apt install docker.io -y
    sudo systemctl enable --now docker
    
  • Run a container:
    sudo docker run -d -p 80:80 nginx
    
  • List running containers:
    sudo docker ps
    

3.2 KVM for Virtual Machines

KVM (Kernel-based Virtual Machine) is used for virtualization.

  • Install KVM:
    sudo apt install qemu-kvm libvirt-daemon-system virt-manager -y
    
  • Create a VM:
    virt-install --name myvm --ram 2048 --disk path=/var/lib/libvirt/images/myvm.qcow2,size=20 --os-type linux --network bridge=virbr0 --cdrom /path/to/iso
    

4. Linux for DevOps and Automation

4.1 Using Ansible for Automation

  • Install Ansible:
    sudo apt install ansible -y
    
  • Create an Ansible playbook:
    - name: Install Nginx
      hosts: servers
      tasks:
        - name: Install Nginx
          apt:
            name: nginx
            state: present
    
  • Run the playbook:
    ansible-playbook install_nginx.yml
    

4.2 CI/CD with Jenkins

Jenkins is a popular automation server for DevOps.

  • Install Jenkins:
    sudo apt install openjdk-11-jdk -y
    wget -q -O - https://pkg.jenkins.io/debian-stable/jenkins.io.key | sudo apt-key add -
    sudo add-apt-repository "deb https://pkg.jenkins.io/debian-stable binary/"
    sudo apt update && sudo apt install jenkins -y
    
  • Start Jenkins:
    sudo systemctl enable --now jenkins
    

5. Linux in Cloud Computing

5.1 AWS Command-Line Tools

AWS CLI allows managing cloud resources from Linux.

  • Install AWS CLI:
    curl "https://awscli.amazonaws.com/AWSCLIV2.pkg" -o "AWSCLIV2.pkg"
    sudo installer -pkg AWSCLIV2.pkg -target /
    
  • Configure AWS CLI:
    aws configure
    

5.2 Deploying Linux Instances on AWS

  • Launch an EC2 instance:
    aws ec2 run-instances --image-id ami-12345678 --count 1 --instance-type t2.micro --key-name MyKeyPair --security-groups MySecurityGroup
    
  • Connect to the instance:
    ssh -i MyKeyPair.pem ec2-user@public-ip-address
    

6. Learning and Career Path in Linux

6.1 Advanced Certifications

  • Red Hat Certified Engineer (RHCE)
  • Linux Foundation Certified Engineer (LFCE)
  • Certified Kubernetes Administrator (CKA)

6.2 Recommended Learning Resources

  • Websites: Linux Academy, The Linux Foundation, CyberSecLab.
  • Books:
    • Linux Bible by Christopher Negus
    • How Linux Works by Brian Ward
    • The Linux Command Line by William Shotts

Conclusion

This final part covered advanced Linux topics including kernel tuning, security hardening, virtualization, DevOps, cloud computing, and career paths. Whether you're a system administrator, developer, or security professional, Linux skills will continue to be valuable in the evolving tech industry.

What's Next?

  • Specialize in Cybersecurity, Cloud, or DevOps.
  • Explore Linux Kernel Development.
  • Contribute to Open Source Projects.

Thank you for following the Linux 101 series! Keep learning, experimenting, and mastering Linux!

Monday, February 3, 2025

Linux 101: Part 10 - Linux for Cybersecurity & Ethical Hacking


In this tenth and final part of our Linux 101 series, we will explore Linux for Cybersecurity & Ethical Hacking. Linux is widely used in the cybersecurity field due to its flexibility, open-source nature, and powerful security tools.

Why Use Linux for Cybersecurity?

  • Open-source – Transparent and customizable.
  • Security-focused distributions – Kali Linux, Parrot OS, and BlackArch.
  • Powerful command-line tools – Essential for security testing.
  • Minimal attack surface – Compared to Windows, Linux is less targeted by malware.

Best Linux Distributions for Ethical Hacking

Distro Features
Kali Linux Preloaded with 600+ security tools
Parrot OS Lightweight, privacy-focused, includes forensic tools
BlackArch Extensive hacking toolkit (3000+ tools)
BackBox Ubuntu-based, optimized for penetration testing
Tails Focused on anonymity, uses Tor by default

Essential Cybersecurity Tools in Linux

1. Network Scanning and Reconnaissance

  • Nmap – Network scanning and enumeration:
    nmap -A -T4 target_ip
    
  • Wireshark – Packet analysis tool:
    wireshark
    
  • Netcat (nc) – Networking tool for port scanning and data transfer:
    nc -v target_ip 80
    

2. Vulnerability Scanning

  • Nikto – Web server vulnerability scanner:
    nikto -h target_ip
    
  • OpenVAS – Open-source vulnerability scanner:
    openvas-setup
    

3. Exploitation & Penetration Testing

  • Metasploit – Framework for exploitation:
    msfconsole
    
  • SQLmap – Automated SQL injection detection:
    sqlmap -u "http://target.com/?id=1" --dbs
    

4. Password Cracking & OSINT

  • John the Ripper – Password cracking tool:
    john --wordlist=password.lst hashfile
    
  • Hashcat – Advanced password recovery:
    hashcat -m 0 -a 3 hashfile ?a?a?a?a
    
  • TheHarvester – OSINT (Open-Source Intelligence) tool:
    theharvester -d target.com -l 500 -b google
    

5. Digital Forensics & Incident Response

  • Autopsy – Digital forensics toolkit:
    autopsy
    
  • Volatility – Memory forensics tool:
    volatility -f memorydump.raw imageinfo
    

Hardening Linux for Security

1. Enable a Firewall

  • UFW (Uncomplicated Firewall):
    sudo ufw enable
    sudo ufw allow ssh
    sudo ufw status
    

2. Disable Unused Services

  • List running services:
    systemctl list-units --type=service
    
  • Disable unnecessary services:
    sudo systemctl disable service-name
    

3. Use AppArmor or SELinux

  • Enable AppArmor:
    sudo aa-status
    
  • Enable SELinux:
    sudo getenforce
    sudo setenforce 1
    

Conclusion

Linux is a powerful tool for cybersecurity professionals, offering extensive tools for ethical hacking, penetration testing, and digital forensics. Whether you're a beginner or an advanced user, mastering Linux can significantly boost your security expertise.

This concludes our Linux 101 series! Thank you for following along. Stay curious, keep exploring, and continue learning Linux!


If you'd like more in-depth topics, let me know what you'd like to explore next!

Saturday, February 1, 2025

Linux 101: Part 9 - Backup and Recovery Strategies in Linux


In this ninth part of our Linux 101 series, we will explore Backup and Recovery Strategies to help protect important files, ensure business continuity, and restore data in case of failure.

Why Backup is Important

Regular backups help:

  • Protect against accidental file deletion.
  • Recover from system crashes or hardware failures.
  • Defend against ransomware and data corruption.
  • Maintain system configurations and logs.

Types of Backups

  1. Full Backup – A complete copy of all data.
  2. Incremental Backup – Saves only changes since the last backup.
  3. Differential Backup – Saves changes since the last full backup.
  4. Snapshot Backup – Captures the system state at a given moment.

Common Linux Backup Tools

Tool Description
tar Archive files and directories
rsync Sync files between locations
rsnapshot Automated incremental backups
borg Efficient deduplicating backups
Timeshift System snapshots (best for desktops)
dd Clone entire disks or partitions
Bacula Enterprise backup solution
Duplicity Encrypted remote backups

Creating Backups with tar

tar (Tape Archive) is a simple tool to create compressed backups.

1. Backup a directory:

tar -czvf backup.tar.gz /home/user/

2. Extract a backup:

tar -xzvf backup.tar.gz

3. Backup only modified files:

tar -czvf backup.tar.gz --newer-mtime='2024-01-01' /home/user/

Synchronizing Backups with rsync

rsync is a powerful tool for file synchronization and backups.

1. Copy files to a backup directory:

rsync -av /home/user/ /backup/

2. Backup files to a remote server:

rsync -avz /home/user/ user@remote-server:/backup/

3. Perform incremental backups:

rsync -av --delete /home/user/ /backup/

Creating System Snapshots with Timeshift

Timeshift is useful for rolling back to a previous system state.

sudo timeshift --create --comments "Before system update"

Cloning Disks with dd

The dd command can clone entire disks or partitions.

1. Clone a disk:

sudo dd if=/dev/sda of=/dev/sdb bs=4M status=progress

2. Create a disk image:

sudo dd if=/dev/sda of=backup.img bs=4M status=progress

3. Restore from a disk image:

sudo dd if=backup.img of=/dev/sda bs=4M status=progress

Automating Backups with Cron Jobs

You can schedule backups automatically using cron.

1. Edit the crontab:

crontab -e

2. Add a daily backup job (runs at 2 AM):

0 2 * * * rsync -av /home/user/ /backup/

Disaster Recovery Strategies

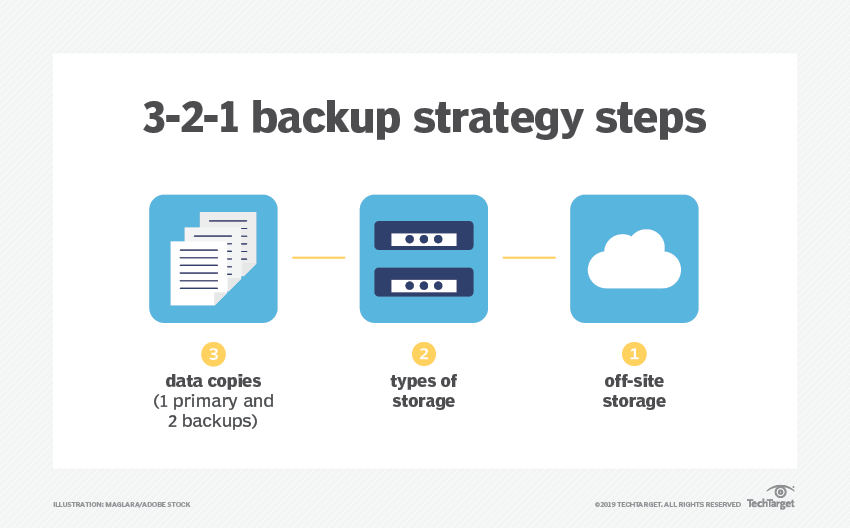
  1. Store backups in multiple locations (local, remote, cloud).
  2. Use encryption to protect sensitive data.
  3. Test backups regularly to ensure they work.
  4. Have a recovery plan documented for quick action.
  5. Create bootable recovery media using tools like Rescuezilla or SystemRescueCd.

Restoring a Linux System from Backup

  • Restore files manually from a tar archive:
    tar -xzvf backup.tar.gz -C /
    
  • Restore system snapshots using Timeshift:
    sudo timeshift --restore
    
  • Restore from a remote backup:
    rsync -av user@remote-server:/backup/ /home/user/
    

Conclusion

A solid backup and recovery strategy is essential for any Linux system. In the next part, we will explore Linux for Cybersecurity & Ethical Hacking, where we discuss security tools and techniques.

Stay tuned for Linux 101: Part 10 – Linux for Cybersecurity & Ethical Hacking!

Thursday, January 30, 2025

Linux 101: Part 8 - System Monitoring and Performance Tuning in Linux


In this eighth part of our Linux 101 series, we will explore System Monitoring and Performance Tuning to help optimize system resources, troubleshoot issues, and improve efficiency.

Why Monitor System Performance?

Monitoring system performance allows you to:

  • Detect and troubleshoot slowdowns.
  • Optimize resource usage.
  • Prevent system crashes and failures.
  • Ensure servers run efficiently.

Essential System Monitoring Commands

1. Checking System Load and CPU Usage

  • View real-time CPU and process usage:
    top
    
  • Enhanced process monitoring (interactive UI):
    htop
    
    (Install htop if not available: sudo apt install htop or sudo dnf install htop)
  • Check CPU load averages:
    uptime
    

2. Checking Memory Usage

  • View memory usage in MB:
    free -m
    
  • Detailed memory usage analysis:
    vmstat 5
    
    (Refreshes every 5 seconds)

3. Checking Disk Usage

  • Check disk space usage:
    df -h
    
  • Check which folders use the most space:
    du -sh /home/*
    

4. Monitoring Running Processes

  • List running processes:
    ps aux
    
  • Find a specific process:
    ps aux | grep processname
    
  • Kill a high-resource-consuming process:
    kill PID
    

5. Checking Network Usage

  • View active network connections:
    netstat -tulnp
    
  • Monitor real-time network usage:
    iftop
    
    (Install with sudo apt install iftop or sudo dnf install iftop)

Performance Tuning in Linux

1. Optimizing CPU Performance

  • Change process priority using nice and renice:
    nice -n 10 command
    
    renice -n -5 -p PID
    
  • Limit CPU usage of a process:
    cpulimit -p PID -l 50
    
    (Install with sudo apt install cpulimit)

2. Managing RAM and Swap Space

  • Clear cached memory:
    sync; echo 3 > /proc/sys/vm/drop_caches
    
  • Check swap usage:
    swapon -s
    
  • Increase swap space:
    sudo fallocate -l 2G /swapfile
    sudo chmod 600 /swapfile
    sudo mkswap /swapfile
    sudo swapon /swapfile
    

3. Improving Disk Performance

  • Enable write caching:
    sudo hdparm -W1 /dev/sda
    
  • Check disk health:
    sudo smartctl -a /dev/sda
    
    (Install with sudo apt install smartmontools)

4. Managing Services and Startup Applications

  • List enabled services:
    systemctl list-units --type=service
    
  • Disable unwanted services:
    sudo systemctl disable service-name
    
  • View startup applications:
    systemd-analyze blame
    

Automating Performance Monitoring

You can automate system monitoring with tools like cron jobs and log monitoring:

  • Log system resource usage every 10 minutes:
    crontab -e
    
    Add this line:
    */10 * * * * free -m >> /var/log/memory.log
    
  • Monitor CPU and memory with sar (install with sudo apt install sysstat):
    sar -u 5 10
    

Conclusion

System monitoring and performance tuning are essential for maintaining a stable Linux environment. In the next part, we will explore Backup and Recovery Strategies in Linux to ensure data protection and disaster recovery planning.

Stay tuned for Linux 101: Part 9 – Backup and Recovery Strategies in Linux!

Friday, January 17, 2025

Linux 101: Part 7 - Shell Scripting and Automation in Linux


In this seventh part of our Linux 101 series, we will explore Shell Scripting and Automation, which helps automate repetitive tasks and improve efficiency in Linux system administration.

What is Shell Scripting?

A shell script is a file containing a series of commands that are executed by the shell. It allows users to automate tasks, schedule jobs, and simplify system management.

Why Use Shell Scripting?

  • Automates repetitive tasks.
  • Reduces manual errors.
  • Improves efficiency in system administration.
  • Schedules jobs to run at specific times.

Writing a Basic Shell Script

1. Creating a Script File

Use a text editor to create a new script file:

nano myscript.sh

2. Writing the Script

Add the following lines:

#!/bin/bash
# This is a simple script
echo "Hello, Linux World!"
date

3. Making the Script Executable

chmod +x myscript.sh

4. Running the Script

./myscript.sh

Variables in Shell Scripting

You can store values in variables and use them within the script.

#!/bin/bash
name="Linux User"
echo "Hello, $name!"

Conditional Statements

Shell scripts can use if statements for decision-making.

#!/bin/bash
num=10
if [ $num -gt 5 ]; then
    echo "Number is greater than 5"
else
    echo "Number is 5 or less"
fi

Looping in Shell Scripts

For Loop

#!/bin/bash
for i in {1..5}; do
    echo "Number: $i"
done

While Loop

#!/bin/bash
count=1
while [ $count -le 5 ]; do
    echo "Count: $count"
    count=$((count + 1))
done

Functions in Shell Scripts

Functions help structure scripts into reusable blocks.

#!/bin/bash
hello() {
    echo "Hello, Linux!"
}
hello

Scheduling Tasks with Cron Jobs

Cron jobs allow tasks to be scheduled at specific times.

Editing the Cron Table

crontab -e

Example Cron Job

Run a script every day at midnight:

0 0 * * * /path/to/script.sh

Automating System Maintenance Tasks

Examples of common automation tasks:

  • Backup important files:
    tar -czf backup.tar.gz /home/user/documents
    
  • Clean temporary files:
    rm -rf /tmp/*
    
  • Monitor system resource usage:
    free -m >> memory.log
    

Conclusion

Shell scripting and automation are powerful tools in Linux for improving productivity and system efficiency. In the next part, we will cover System Monitoring and Performance Tuning in Linux to optimize system performance.

Stay tuned for Linux 101: Part 8 – System Monitoring and Performance Tuning in Linux!

Wednesday, January 15, 2025

Linux 101: Part 6 - Process and Job Management in Linux

In the sixth part of our Linux 101 series, we will explore process and job management in Linux. Understanding how to manage running processes is crucial for system administration, troubleshooting, and optimizing system performance.

Understanding Linux Processes

A process is a running instance of a program. Every process in Linux is assigned a unique Process ID (PID) and belongs to a user.

Types of Processes:

  • Foreground processes: Run in the terminal and require user interaction.
  • Background processes: Run in the background without user interaction.
  • Daemon processes: System processes that run in the background (e.g., SSH, cron jobs).

Viewing Running Processes

Use these commands to monitor running processes:

  • View active processes:
    ps aux
    
  • View processes dynamically:
    top
    
    or use an improved version:
    htop
    
  • View processes for a specific user:
    ps -u username
    
  • Find a specific process by name:
    ps aux | grep processname
    

Managing Processes

Killing a Process

  • Terminate a process by PID:
    kill PID
    
  • Force kill a process:
    kill -9 PID
    
  • Kill a process by name:
    pkill processname
    
  • Kill all instances of a process:
    killall processname
    

Changing Process Priority

Every process has a priority value called nice value (ranges from -20 to 19, where -20 is the highest priority and 19 is the lowest).

  • Start a process with a lower priority:
    nice -n 10 command
    
  • Change priority of a running process:
    renice -n 5 -p PID
    
  • Check priority of running processes:
    ps -eo pid,comm,nice
    

Managing Jobs in Linux

Linux allows job control to manage multiple processes in the terminal.

Running and Controlling Jobs

  • Run a command in the background:
    command &
    
  • View background jobs:
    jobs
    
  • Bring a background job to the foreground:
    fg %jobID
    
  • Suspend a running process: Press Ctrl + Z
  • Resume a suspended job in the background:
    bg %jobID
    
  • Terminate a background job:
    kill %jobID
    

Monitoring System Performance

Use these commands to analyze CPU, memory, and process usage:

  • Check system resource usage:
    vmstat 5
    
  • Monitor memory usage:
    free -m
    
  • View disk usage:
    df -h
    
  • Check I/O performance:
    iostat
    

Conclusion

Managing processes and jobs is essential for system stability and efficiency. In the next part, we will explore Linux Shell Scripting and Automation, which will help you automate tasks and improve productivity.

Stay tuned for Linux 101: Part 7 – Shell Scripting and Automation in Linux!

Tuesday, December 31, 2024

Linux 101: Part 5 - Networking and Security Basics in Linux


In this fifth part of our Linux 101 series, we will explore essential networking concepts and security basics in Linux. Understanding these topics is crucial for managing servers, troubleshooting network issues, and securing a Linux environment.

Understanding Linux Networking

Linux provides various tools and commands to manage and troubleshoot network connections. Below are some fundamental networking concepts:

  • IP Address: A unique identifier for a device on a network.
  • Subnet Mask: Defines the network and host portion of an IP address.
  • Gateway: The router that connects a local network to other networks.
  • DNS (Domain Name System): Resolves domain names into IP addresses.
  • MAC Address: The hardware address of a network interface.

Checking Network Configuration

Use the following commands to view network details:

  • Check IP Address:

    ip a
    

    or

    ifconfig
    
  • Check Network Routes:

    ip route show
    

    or

    route -n
    
  • Check DNS Configuration:

    cat /etc/resolv.conf
    

Testing Network Connectivity

  • Ping a Host (Check if a server is reachable):
    ping -c 4 google.com
    
  • Check Open Ports on a System:
    netstat -tulnp
    
    or
    ss -tulnp
    
  • Traceroute (Check network path to a destination):
    traceroute google.com
    
  • DNS Lookup:
    nslookup google.com
    
    or
    dig google.com
    

Network Configuration and Management

Assigning an IP Address

Manually set an IP address using:

sudo ip addr add 192.168.1.100/24 dev eth0

Bringing Network Interfaces Up/Down

  • Disable a network interface:
    sudo ip link set eth0 down
    
  • Enable a network interface:
    sudo ip link set eth0 up
    

Security Basics in Linux

Security is a critical aspect of managing a Linux system. Below are some fundamental security practices:

Managing User Access

  • Locking a User Account:
    sudo passwd -l username
    
  • Unlocking a User Account:
    sudo passwd -u username
    
  • Checking Last Login of a User:
    last username
    

Managing Firewalls

Linux includes built-in firewall tools such as iptables and ufw (Uncomplicated Firewall).

  • Enable UFW:
    sudo ufw enable
    
  • Allow SSH Connections:
    sudo ufw allow ssh
    
  • Block a Specific IP Address:
    sudo ufw deny from 192.168.1.10
    
  • Check Firewall Rules:
    sudo ufw status
    

Checking System Logs

Log files store critical system activity and security events.

  • View Authentication Logs:
    cat /var/log/auth.log
    
  • View System Logs:
    journalctl -xe
    
  • View Failed Login Attempts:
    sudo faillog -a
    

Securing SSH

  • Disable Root Login via SSH: Edit the SSH configuration file:
    sudo nano /etc/ssh/sshd_config
    
    Set:
    PermitRootLogin no
    
    Restart SSH service:
    sudo systemctl restart sshd
    

Keeping Your System Updated

Regularly update your Linux system to patch security vulnerabilities:

  • For Debian/Ubuntu:
    sudo apt update && sudo apt upgrade -y
    
  • For Fedora/RHEL:
    sudo dnf update -y
    
  • For Arch Linux:
    sudo pacman -Syu
    

Conclusion

This article introduced fundamental Linux networking and security concepts. In the next part, we will cover Linux Process and Job Management to help you manage running applications and system performance.

Stay tuned for Linux 101: Part 6 – Process and Job Management in Linux!

Sunday, September 1, 2024

Linux 101: Part 4 - User and Permission Management in Linux


In the previous parts of our Linux 101 series, we covered the basics of Linux, the file system, and package management. Now, in Part 4, we will focus on user and permission management—essential for maintaining system security and access control.

Understanding Users and Groups

Linux is a multi-user operating system, meaning multiple users can access the system with different permission levels. Users are managed through:

  • User accounts: Each user has a unique ID (UID) and home directory.
  • Groups: A collection of users with shared permissions.
  • Root user: The superuser with full administrative privileges.

Managing Users

1. Adding a New User

To create a new user, use:

sudo adduser username

This command creates a home directory (/home/username) and sets a password.

2. Changing User Password

To update a user's password:

sudo passwd username

3. Deleting a User

To remove a user but keep their files:

sudo deluser username

To remove a user and their home directory:

sudo deluser --remove-home username

Managing Groups

1. Creating a New Group

sudo groupadd groupname

2. Adding a User to a Group

sudo usermod -aG groupname username

3. Viewing User and Group Information

  • Show current user:
    whoami
    
  • Show all users:
    cat /etc/passwd
    
  • Show all groups:
    cat /etc/group
    
  • Show which groups a user belongs to:
    groups username
    

File Permissions

Each file and directory in Linux has permission settings that define who can read, write, and execute it. You can check permissions using:

ls -l

Example output:

-rwxr-xr--  1 user group 4096 Jan 1 12:00 script.sh

Breakdown:

Symbol Meaning
r Read permission
w Write permission
x Execute permission
- No permission

Permissions are divided into three sections:

  1. Owner (user) - First three characters (rwx)
  2. Group - Next three characters (r-x)
  3. Others - Last three characters (r--)

Changing File Permissions

1. Using chmod

To change file permissions, use:

chmod 755 script.sh

Breakdown:

  • 7 (Owner: rwx = Read, Write, Execute)
  • 5 (Group: r-x = Read, Execute)
  • 5 (Others: r-x = Read, Execute)

Alternatively, you can add/remove specific permissions:

  • Add execute permission for owner:
    chmod u+x script.sh
    
  • Remove write permission for group:
    chmod g-w script.sh
    

2. Using chown

Change file ownership with:

sudo chown newowner:newgroup file.txt

3. Using chgrp

Change group ownership:

sudo chgrp newgroup file.txt

Special Permissions: SUID, SGID, and Sticky Bit

  1. SUID (Set User ID) – Allows a file to be executed with the permissions of the file’s owner.
    chmod u+s filename
    
  2. SGID (Set Group ID) – Ensures files created within a directory inherit the group.
    chmod g+s directory
    
  3. Sticky Bit – Ensures only the file owner can delete files in a directory.
    chmod +t directory
    

Conclusion

Understanding user and permission management is essential for securing a Linux system. In the next part, we will cover Networking and Security Essentials in Linux.

Stay tuned for Linux 101: Part 5 – Networking and Security Basics!

Thursday, August 1, 2024

Linux 101: Part 3 - Managing Software Packages in Linux

In the previous parts of our Linux 101 series, we introduced Linux and explored its file system. Now, in Part 3, we will focus on managing software packages in Linux. Understanding package management is crucial for installing, updating, and removing software efficiently.

What is a Package Manager?

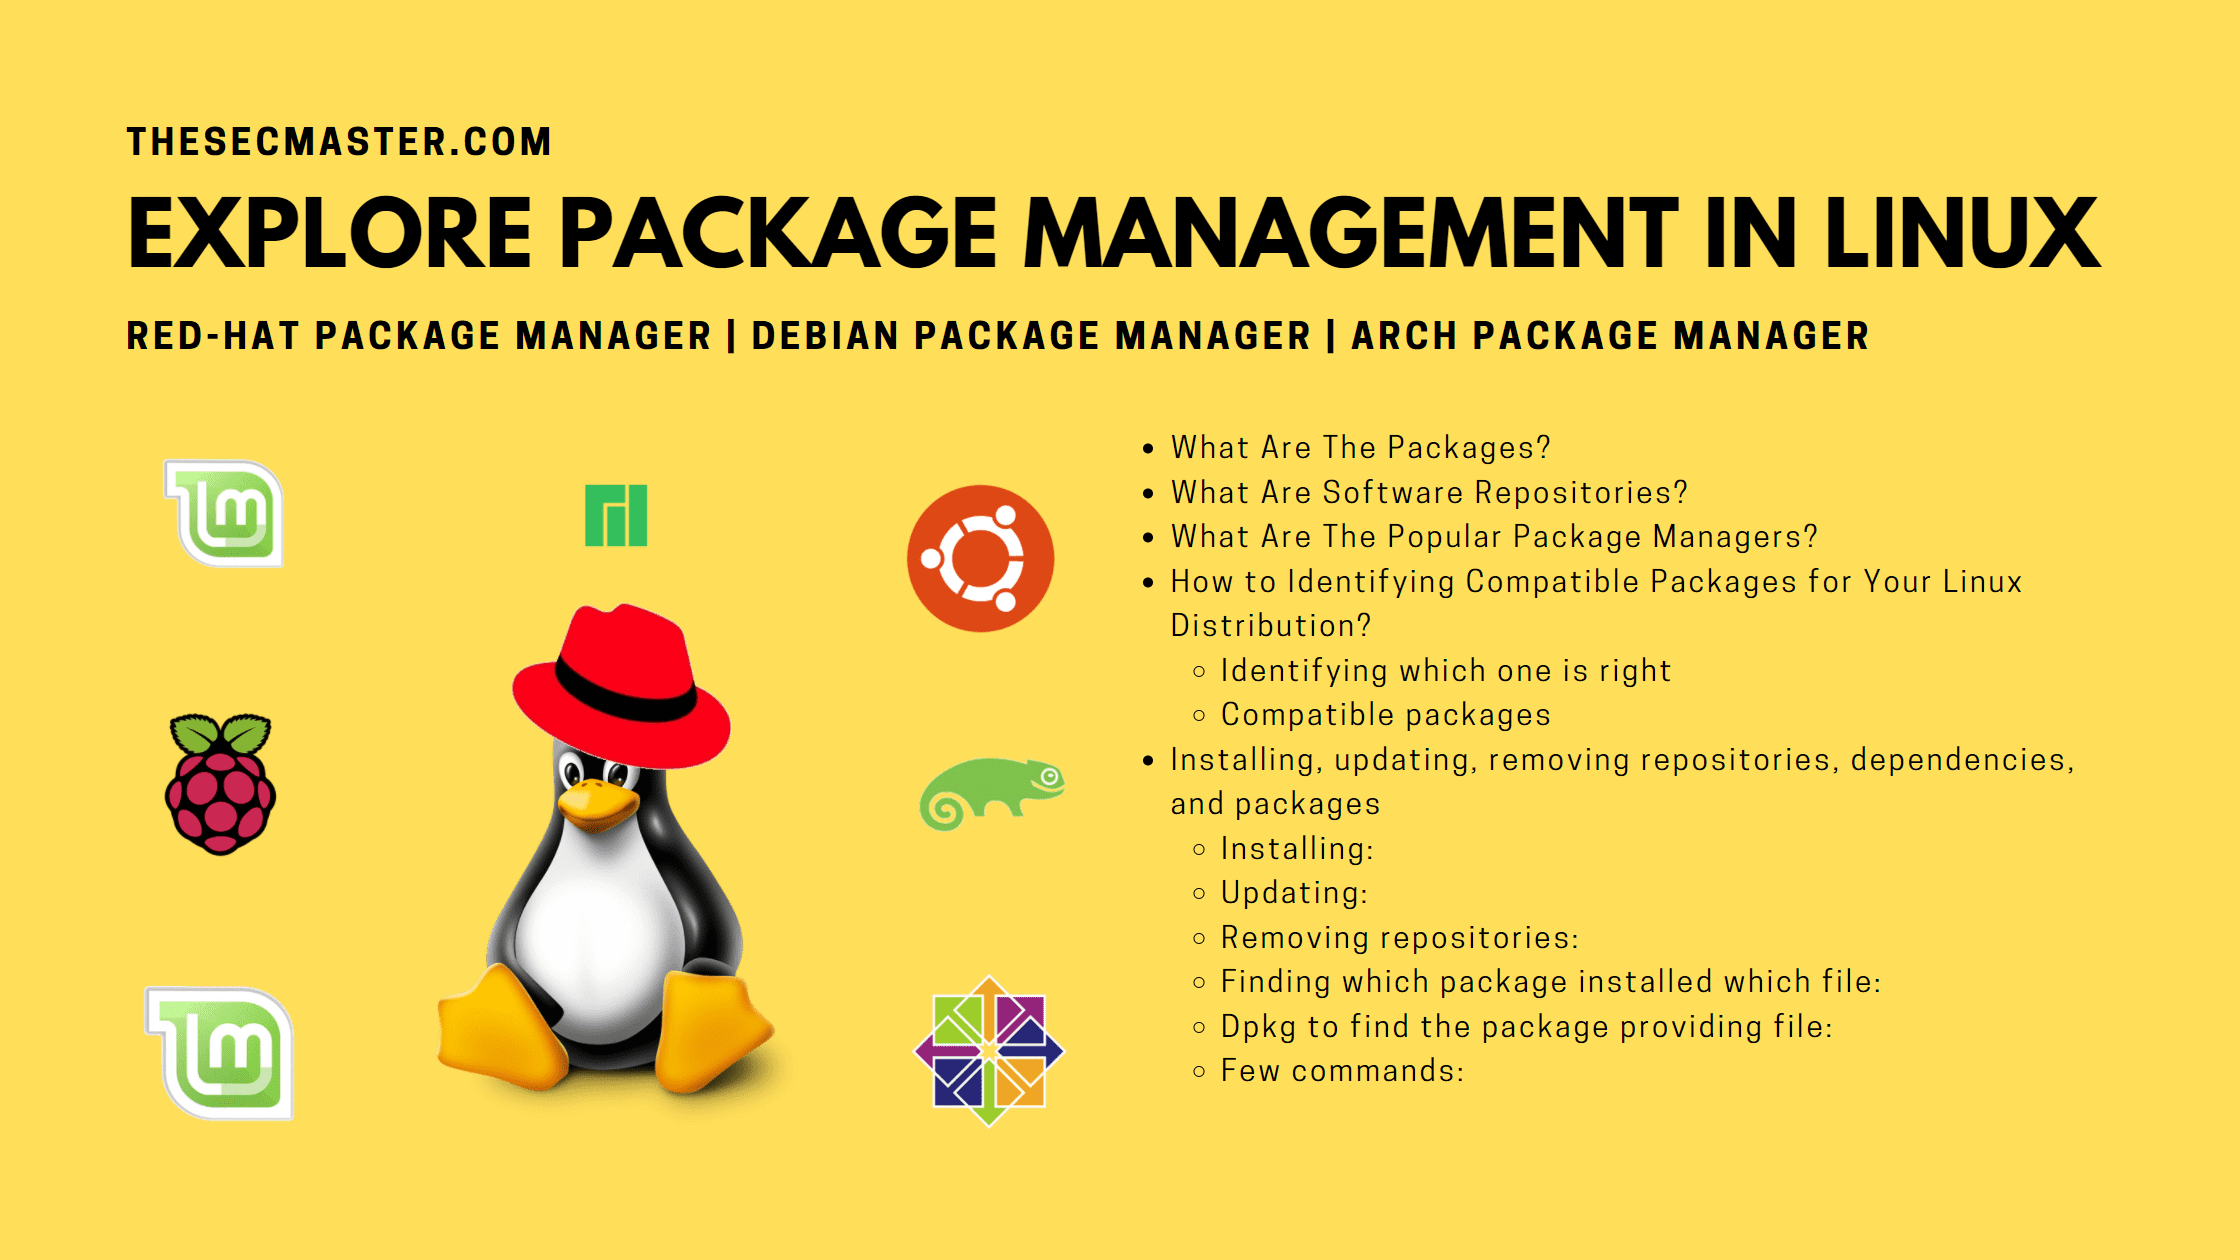
A package manager is a tool that automates the process of installing, upgrading, configuring, and removing software. Different Linux distributions use different package managers. Here are some of the most common ones:

  • APT (Advanced Package Tool) – Used by Debian-based distributions like Ubuntu and Debian.
  • DNF/YUM (Dandified Yum) – Used by Fedora, CentOS, and RHEL.
  • Pacman – Used by Arch Linux.
  • Zypper – Used by openSUSE.
  • Snap & Flatpak – Universal package managers that work across different Linux distributions.

Package Management Commands

Below are some essential commands for managing software in different Linux distributions.

APT (Debian & Ubuntu)

  • Update package list:
    sudo apt update
    
  • Upgrade installed packages:
    sudo apt upgrade
    
  • Install a package:
    sudo apt install package-name
    
  • Remove a package:
    sudo apt remove package-name
    
  • Search for a package:
    apt search package-name
    

DNF/YUM (Fedora, CentOS, RHEL)

  • Update package list:
    sudo dnf check-update
    
  • Install a package:
    sudo dnf install package-name
    
  • Remove a package:
    sudo dnf remove package-name
    
  • Search for a package:
    dnf search package-name
    

Pacman (Arch Linux)

  • Update package database and upgrade system:
    sudo pacman -Syu
    
  • Install a package:
    sudo pacman -S package-name
    
  • Remove a package:
    sudo pacman -R package-name
    
  • Search for a package:
    pacman -Ss package-name
    

Snap and Flatpak (Universal Package Managers)

Snap

  • Install Snap:
    sudo apt install snapd
    
  • Install a Snap package:
    sudo snap install package-name
    
  • Remove a Snap package:
    sudo snap remove package-name
    

Flatpak

  • Install Flatpak:
    sudo apt install flatpak
    
  • Install a Flatpak package:
    flatpak install flathub package-name
    
  • Remove a Flatpak package:
    flatpak uninstall package-name
    

Keeping Your System Updated

Keeping software up to date is essential for security and performance. Here are some general guidelines:

  • Regularly update your package lists (apt update, dnf check-update, pacman -Syu).
  • Upgrade packages (apt upgrade, dnf upgrade, pacman -Syu).
  • Remove unnecessary packages (apt autoremove, dnf autoremove, pacman -Rns).

Conclusion

Managing software packages in Linux is a fundamental skill that will help you keep your system running smoothly. In the next part of this series, we will cover User and Permission Management in Linux.

Stay tuned for Linux 101: Part 4 – User and Permission Management!

Wednesday, July 31, 2024

Linux 101: Part 2 - Understanding the Linux File System


In the first part of this series, we introduced Linux and why it is a great operating system to learn. Now, in Part 2, we will explore the Linux file system, its structure, and how to navigate it effectively.

The Linux File System Structure

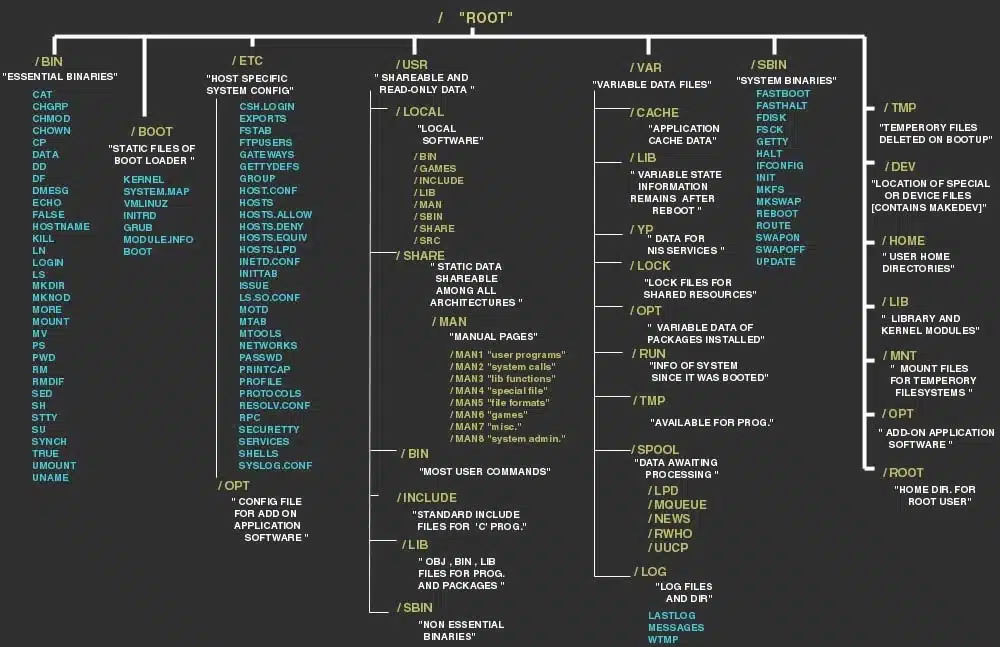
Unlike Windows, where files are stored across multiple drives (C:, D:, etc.), Linux follows a hierarchical file system. Everything starts from the root directory (/), and all files and directories branch out from there.

Here is an overview of the most important directories:

  • / (Root Directory) – The base of the file system.
  • /bin – Essential binaries and command-line programs.
  • /boot – Contains bootloader files and the Linux kernel.
  • /dev – Device files, including hard drives and peripherals.
  • /etc – System configuration files.
  • /home – Home directories for users.
  • /lib – Shared libraries required by system programs.
  • /mnt – Mount point for temporary file systems.
  • /opt – Optional software packages.
  • /proc – Virtual file system for system processes.
  • /root – Home directory for the root user.
  • /sbin – System binaries (commands for system administrators).
  • /tmp – Temporary files.
  • /usr – User-installed applications and files.
  • /var – Variable files like logs and caches.

Navigating the Linux File System

To move around the Linux file system, you need to be comfortable with the command line. Below are some essential commands:

Viewing and Navigating Directories

  • pwd – Displays the current directory path.
  • ls – Lists files and directories.
  • cd <directory> – Changes to the specified directory.
    • Example: cd /home/user/Documents
  • cd .. – Moves up one level in the directory tree.
  • cd / – Moves to the root directory.

File and Directory Management

  • mkdir <directory> – Creates a new directory.
    • Example: mkdir myfolder
  • rmdir <directory> – Removes an empty directory.
  • rm -r <directory> – Deletes a directory and its contents.
  • touch <file> – Creates a new empty file.
    • Example: touch myfile.txt
  • cp <source> <destination> – Copies files and directories.
  • mv <source> <destination> – Moves or renames files and directories.
  • rm <file> – Deletes a file.

Viewing File Contents

  • cat <file> – Displays the file's contents.
  • less <file> – Views the file page by page.
  • head <file> – Shows the first 10 lines of a file.
  • tail <file> – Shows the last 10 lines of a file.

File Permissions and Ownership

Each file and directory in Linux has a set of permissions that define who can read, write, and execute them. Use the ls -l command to check permissions:

Example output:

-rw-r--r--  1 user user  4096 Jan 1 12:00 myfile.txt

Breakdown:

  • rw- (Owner: Read & Write)
  • r-- (Group: Read only)
  • r-- (Others: Read only)

Changing Permissions

Use the chmod command to modify permissions:

  • chmod 755 myscript.sh – Gives execute permission to the owner, and read/execute to others.
  • chmod +x myscript.sh – Adds execute permission to a script.

Changing Ownership

Use the chown command to change file ownership:

  • chown user:group myfile.txt – Assigns the file to a new owner and group.

Conclusion

Understanding the Linux file system and how to navigate it is crucial for anyone learning Linux. In the next part of this series, we will dive deeper into Linux package management and how to install software efficiently.

Stay tuned for Linux 101: Part 3 – Managing Software Packages in Linux!

Monday, July 1, 2024

Linux 101: Part 1 - Introduction to Linux


Linux is one of the most popular and widely used operating systems, especially among developers, system administrators, and cybersecurity professionals. Whether you're a beginner or someone looking to enhance your knowledge, understanding Linux can be an essential skill. In this first part of our Linux 101 series, we'll cover the basics of Linux, its history, and why you should consider using it.

What is Linux?

Linux is an open-source, Unix-like operating system kernel developed by Linus Torvalds in 1991. Over the years, it has grown into a complete OS thanks to contributions from developers worldwide. Unlike Windows or macOS, Linux is free and highly customizable.

Why Use Linux?

Here are a few reasons why Linux is a great choice:

  1. Open-Source & Free – Linux is free to use, modify, and distribute.

  2. Security & Stability – It is known for its robust security and minimal vulnerability to malware.

  3. Performance – Linux is lightweight and runs efficiently on both new and old hardware.

  4. Customization – You can tailor Linux to your needs with different distributions (distros).

  5. Command Line Power – The Linux terminal is incredibly powerful and useful for automation.

Popular Linux Distributions

A Linux distribution (distro) is a version of Linux that comes with different software and features. Some of the most popular ones include:

  • Ubuntu – User-friendly and great for beginners.

  • Debian – Stable and widely used in servers.

  • Fedora – Cutting-edge with frequent updates.

  • Arch Linux – Lightweight and highly customizable.

  • Kali Linux – Designed for security testing and ethical hacking.

Basic Linux Terminology

Before diving deeper, it's good to understand some common Linux terms:

  • Kernel: The core of the Linux operating system that manages hardware.

  • Shell: A command-line interface that allows users to interact with the OS.

  • Terminal: A program that provides access to the shell.

  • Package Manager: A tool to install and manage software (e.g., apt for Debian-based distros, dnf for Fedora, pacman for Arch).

  • Root: The superuser account with full control over the system.

How to Get Started with Linux

  1. Choose a Distro – Ubuntu is recommended for beginners.

  2. Create a Bootable USB – Use tools like Rufus or Balena Etcher to create a Linux live USB.

  3. Try a Live Session – Most distros allow you to run Linux without installing it.

  4. Install Linux – If you decide to install, follow the guided installation process.

  5. Explore the Terminal – Get familiar with basic commands like ls, cd, mkdir, rm, and man.

Next Steps

In the upcoming parts of this series, we will explore:

  • Linux file system structure

  • Basic command-line operations

  • User and permission management

  • Package management

  • Networking and security essentials

Stay tuned for Linux 101: Part 2, where we will dive into the Linux file system!

Final Thoughts

Linux is a powerful and versatile operating system that can benefit everyone, from casual users to IT professionals. Learning Linux will not only improve your technical skills but also open doors to various career opportunities in IT, cybersecurity, and software development.

If you have any questions or suggestions, feel free to leave a comment below. Happy learning!